> ## Documentation Index
> Fetch the complete documentation index at: https://docs.minestorecms.com/llms.txt
> Use this file to discover all available pages before exploring further.
# Discord Bot
> Sync your Discord server with your webstore to manage roles and permissions.
## Introduction
This is a relatively new feature that allows you to **sync** your **Discord server** with your webstore **to manage roles and members**. By setting up the **Discord Bot**, you can automatically **assign roles** to users based on their purchases.
This bot is in-built with the **MineStoreCMS** and can be enabled in the **Discord Settings** section. You can configure the bot to **sync roles** and **manage permissions** for your Discord server. This bot is written on the **Laravel (PHP)** and uses the **Discord API** to interact with your **Discord server**.
**MineStoreCMS** supports **Discord Bot** feature since version 3.2.5. You need also have a compatible components of the template (default theme includes it by default).
## Features
The **Discord Bot** allows you to:
* **Sync Roles**: Automatically assign roles to users based on their purchases.
* **Discord OAuth**: Authenticate users using Discord OAuth to define which Discord ID belongs to which user.
* **Manage Permissions**: Manage permissions for users based on their roles in Discord.
## Setting Up Discord Bot
### Step 1: Create Discord Application
1. Go to the [Discord Developer Portal](https://discord.com/developers/applications).
2. Click on **"New Application"**.
3. Enter the **Application Name** and click on **"Create"**.
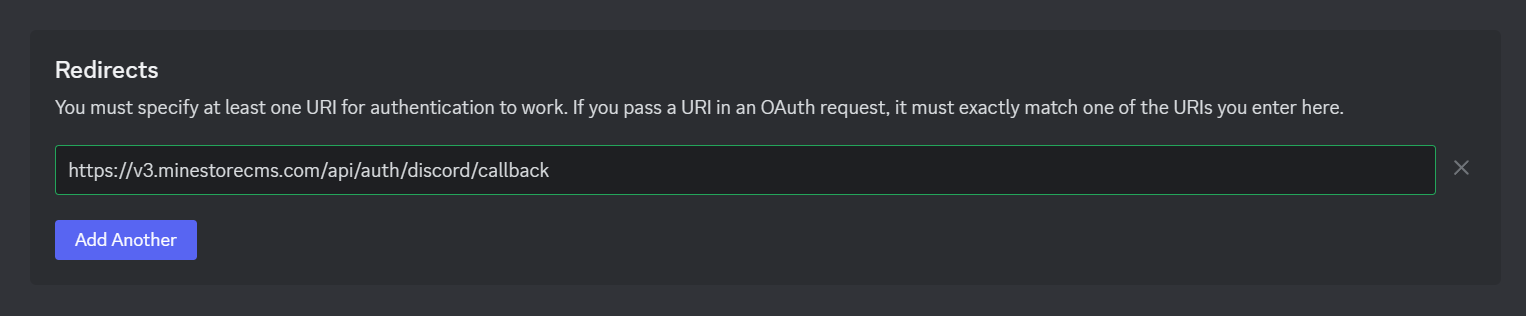
### Step 2: Configure Redirect URL
1. Go to the **OAuth2** section in the sidebar menu.
2. Click on **"Add Redirect"**.
3. Enter the **Redirect URL**. Example: `https://store.com/api/auth/discord/callback`.
4. Press **"Save Changes"**.
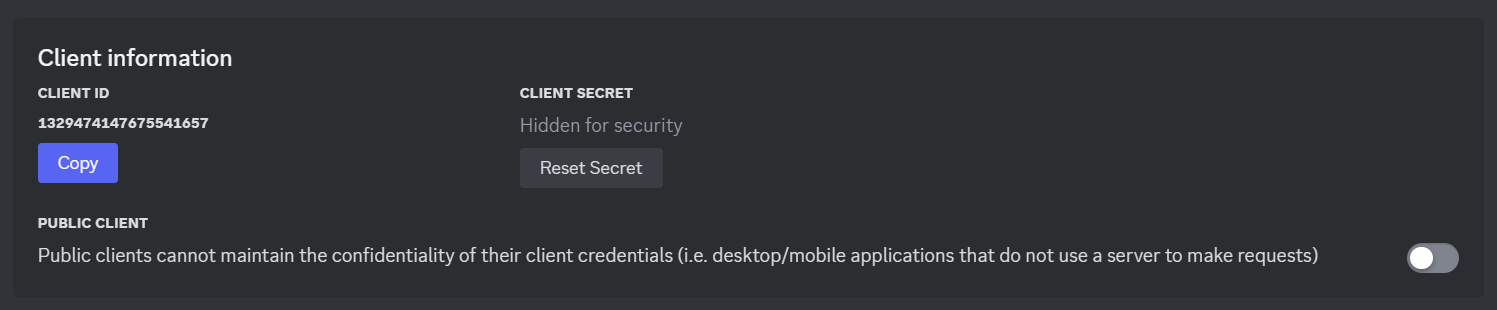
 ### Step 3: Get Client ID and Client Secret
1. Go to the **OAuth2** section in the sidebar menu.
2. Find the **Client information** section.
3. Copy the **Client ID** and **Client Secret** (by resetting the secret).
### Step 3: Get Client ID and Client Secret
1. Go to the **OAuth2** section in the sidebar menu.
2. Find the **Client information** section.
3. Copy the **Client ID** and **Client Secret** (by resetting the secret).
 ### Step 4: Configure Discord Bot
1. Go to the **Bot** section in the sidebar menu.
2. Set the **Bot Username** and **Avatar**.
3. Scroll down and enable **"Server Members Intent"** option.
4. Scroll up and copy the **Token**.
### Step 4: Configure Discord Bot
1. Go to the **Bot** section in the sidebar menu.
2. Set the **Bot Username** and **Avatar**.
3. Scroll down and enable **"Server Members Intent"** option.
4. Scroll up and copy the **Token**.
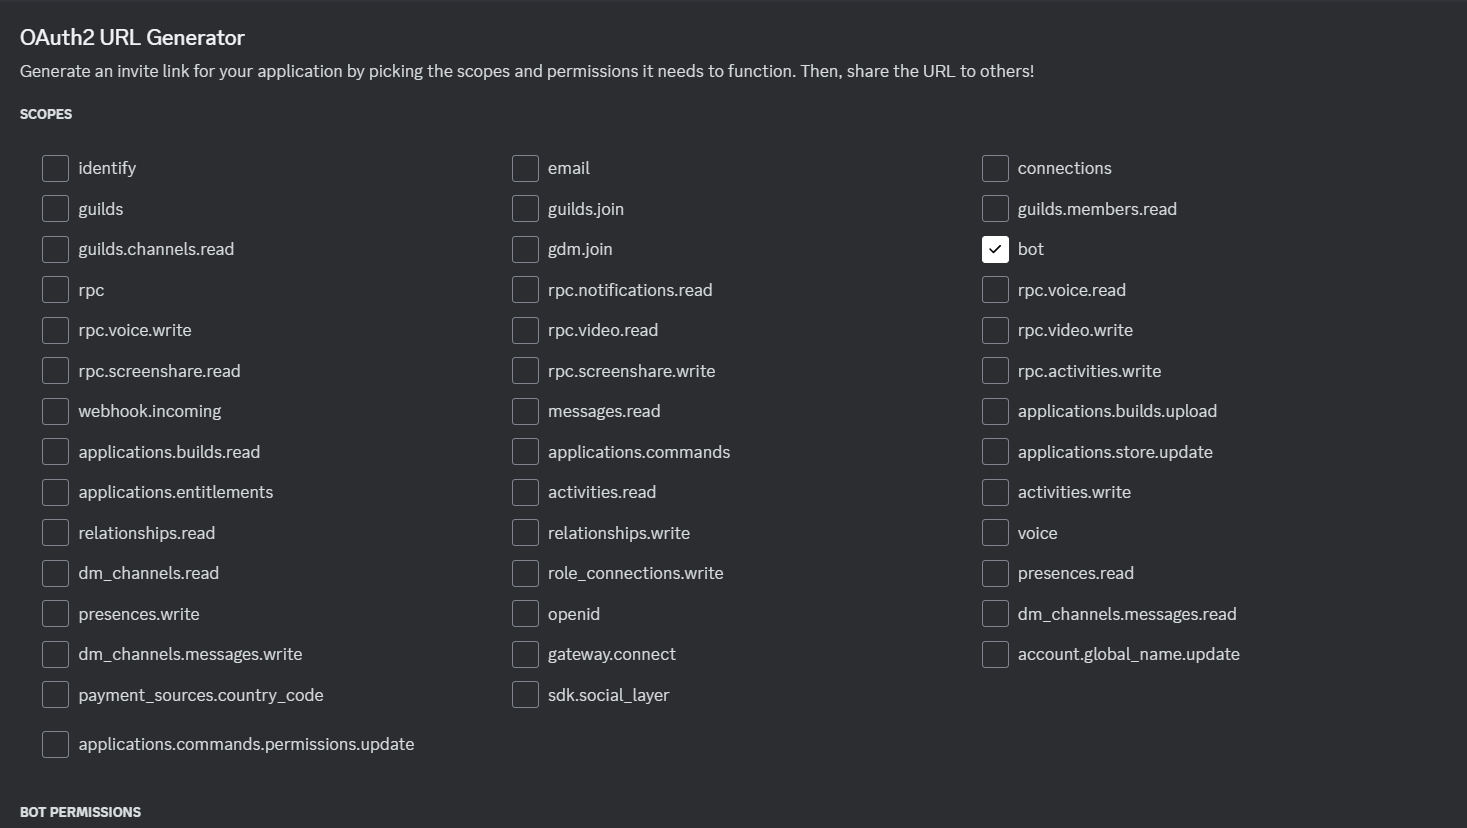
 ### Step 5: Invite Bot to Your Discord Server
1. Go to the **OAuth2** section in the sidebar menu.
2. Scroll down to the **OAuth2 URL Generator**.
3. Select the **"Bot"** scope.
4. Select the **"Administrator"** permission or permissions as below (recommended):
* **Manage Roles**
* **View Channels**
* **Send Messages**
* **Read Message History**
5. Copy the generated URL and open it in your browser.
6. Select the **Discord server** where you want to invite the bot.
7. Press **"Authorize"**.
### Step 5: Invite Bot to Your Discord Server
1. Go to the **OAuth2** section in the sidebar menu.
2. Scroll down to the **OAuth2 URL Generator**.
3. Select the **"Bot"** scope.
4. Select the **"Administrator"** permission or permissions as below (recommended):
* **Manage Roles**
* **View Channels**
* **Send Messages**
* **Read Message History**
5. Copy the generated URL and open it in your browser.
6. Select the **Discord server** where you want to invite the bot.
7. Press **"Authorize"**.
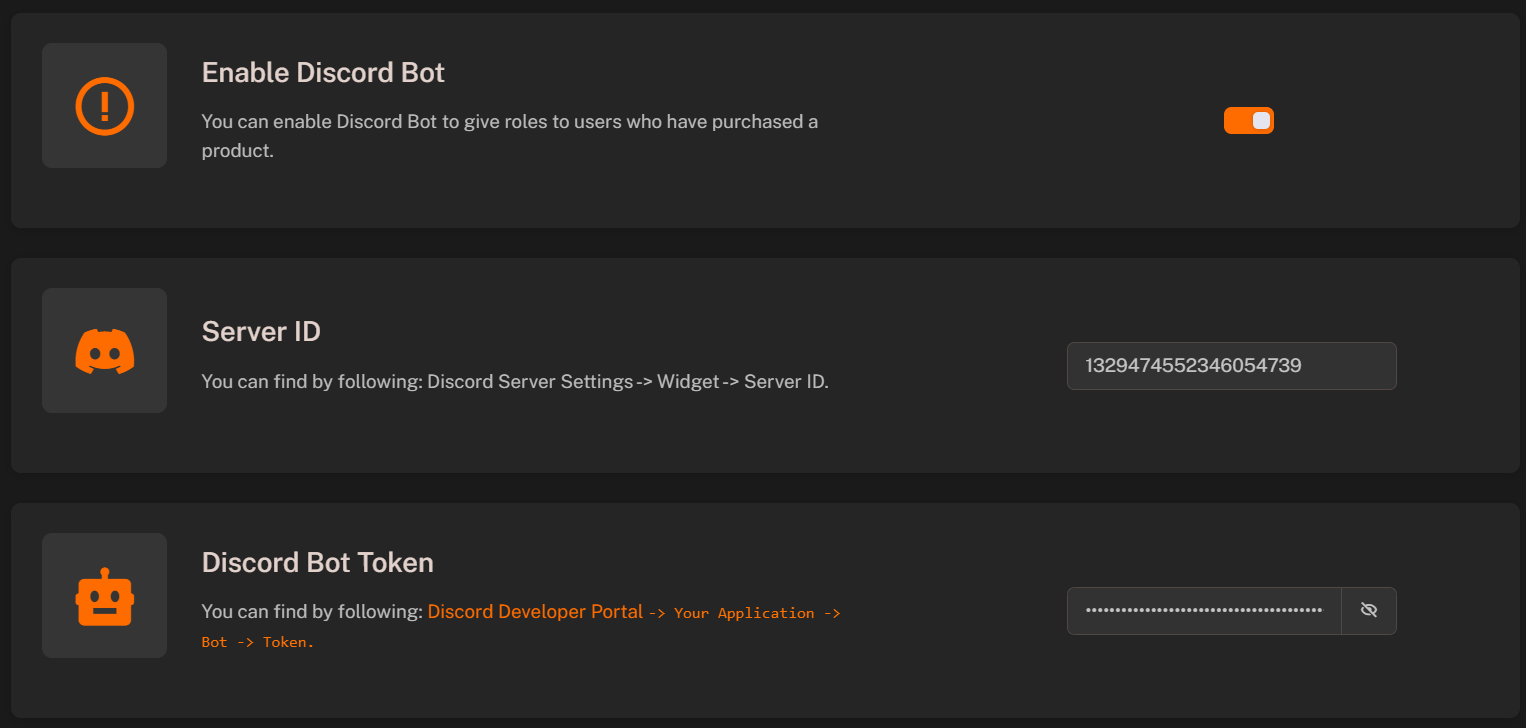
 ### Step 5: Configuring Discord Integration in Admin Panel
1. Log in to your **Admin Panel**.
2. Go to the **Discord Settings** section.
3. Enter the [Webhook URL](/features/settings/discord-settings#how-to-create-a-discord-webhook) and [Server ID](/features/settings/discord-settings#how-to-get-discord-server-id).
4. Enter the **Client ID**, **Client Secret**, and **Bot Token** that you obtained from the Discord Developer Portal.
5. Enable the **Discord Bot** feature.
6. Press **Save** to apply the changes.
7. **Done!** Your Discord Bot is now set up and ready to sync roles and permissions.
### Step 5: Configuring Discord Integration in Admin Panel
1. Log in to your **Admin Panel**.
2. Go to the **Discord Settings** section.
3. Enter the [Webhook URL](/features/settings/discord-settings#how-to-create-a-discord-webhook) and [Server ID](/features/settings/discord-settings#how-to-get-discord-server-id).
4. Enter the **Client ID**, **Client Secret**, and **Bot Token** that you obtained from the Discord Developer Portal.
5. Enable the **Discord Bot** feature.
6. Press **Save** to apply the changes.
7. **Done!** Your Discord Bot is now set up and ready to sync roles and permissions.
 ## Role Syncing
The **Discord Bot** automatically parses the **Discord Server** for existing roles and syncs them with the **MineStoreCMS**.
When a user makes a purchase on your webstore, the **Discord Bot** assigns the corresponding role to the user on your **Discord server**. This allows you to manage roles and permissions for users based on their purchases.
## Package Setup
You can configure which **packages** should be assigned to which **Discord roles** in the **Packages** section of the **Admin Panel**.
Configure which packages should be assigned to which Discord roles.
## Bot Debugging
If you encounter any issues, you can **manually** run it by using the following command:
```bash theme={null}
cd /var/www/minestore
php artisan discord:run
```
You also can check the **logs** by running the following command:
```bash theme={null}
tail -f /var/log/minestore_discord-bot.log
```
## Role Syncing
The **Discord Bot** automatically parses the **Discord Server** for existing roles and syncs them with the **MineStoreCMS**.
When a user makes a purchase on your webstore, the **Discord Bot** assigns the corresponding role to the user on your **Discord server**. This allows you to manage roles and permissions for users based on their purchases.
## Package Setup
You can configure which **packages** should be assigned to which **Discord roles** in the **Packages** section of the **Admin Panel**.
Configure which packages should be assigned to which Discord roles.
## Bot Debugging
If you encounter any issues, you can **manually** run it by using the following command:
```bash theme={null}
cd /var/www/minestore
php artisan discord:run
```
You also can check the **logs** by running the following command:
```bash theme={null}
tail -f /var/log/minestore_discord-bot.log
```