Access Configuration Page
To access the configuration (installation) page, navigate to your webstore URL and append/install to the end of the URL. For example, if your webstore URL is https://example.com, you would navigate to https://example.com/install.
Configuration Steps
The configuration page will guide you through the process of setting up your webstore. You will be asked to enter information about your webstore, upload logo, setup Discord integration and etc.1. Diagnostic Check
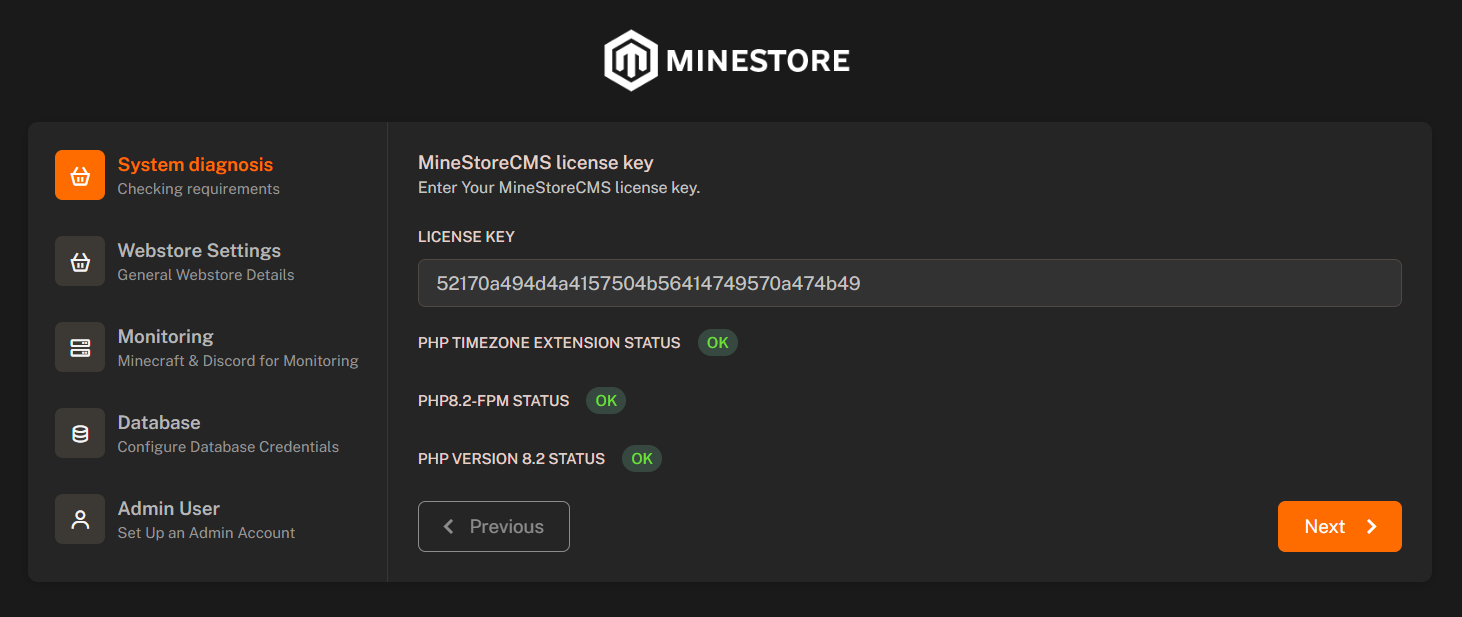
Usually, the first step is a diagnostic check to ensure that installer installed all required software and extensions. If there are any issues, you will be prompted to resolve them before continuing.- License Key: Enter your MineStoreCMS license key if it is not already filled in.
- PHP Timezone: Make sure PHP timezone extension is enabled and working.
- PHP Version: Make sure your server is running PHP 8.2 FPM.
Discord Support Server
Join our Discord server for support and assistance.
2. Webstore Information
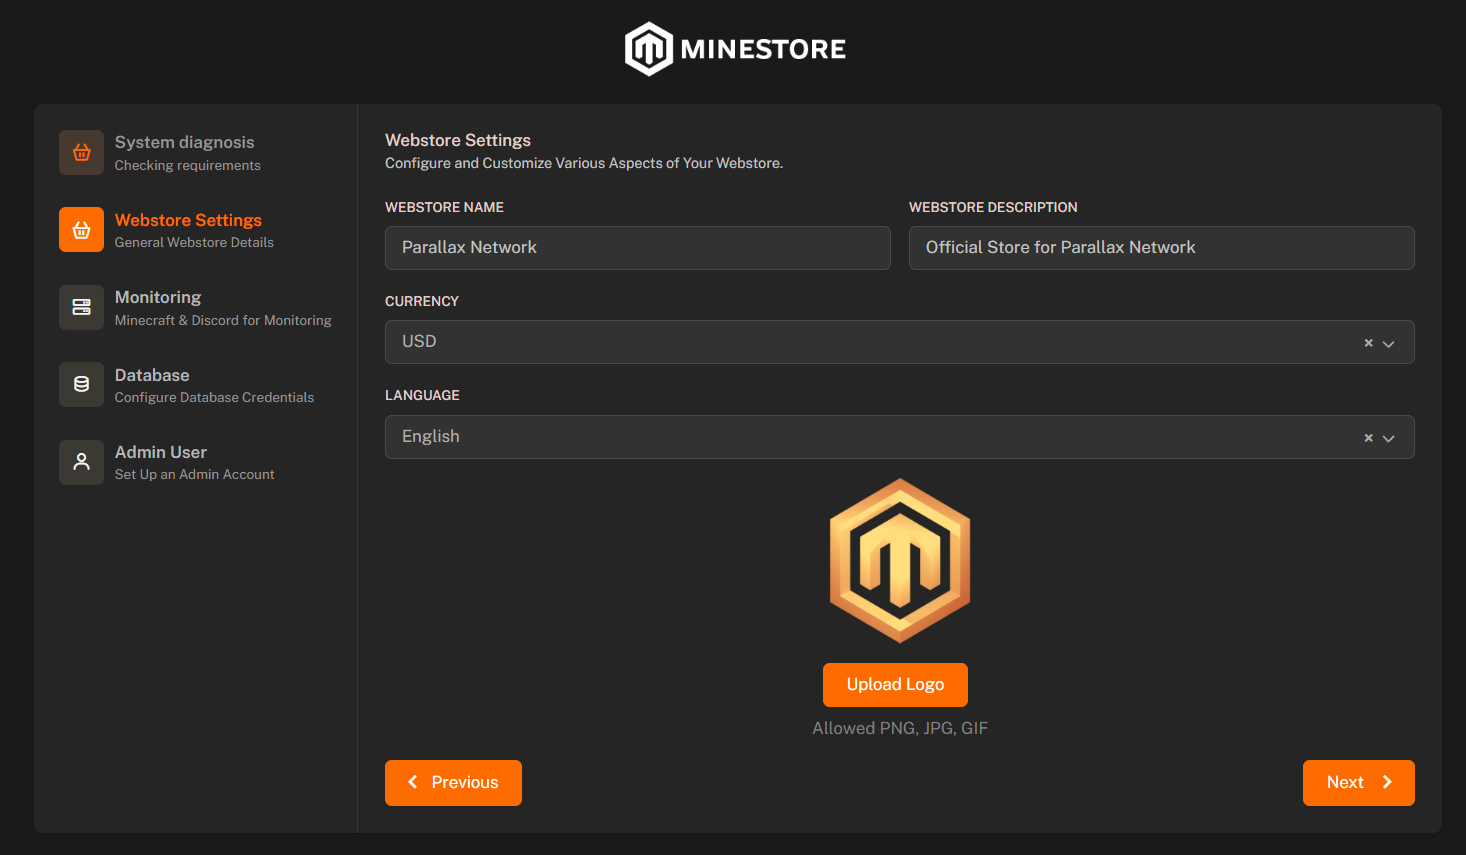
- Webstore Name: Enter the name of your webstore.
- Webstore Description: Enter a brief description of your webstore for SEO purposes.
- Primary Currency: Select the main currency for your webstore.
- Primary Language: Select the primary language for your webstore.
- Webstore Logo: Upload a logo for your webstore.
3. Monitoring Details
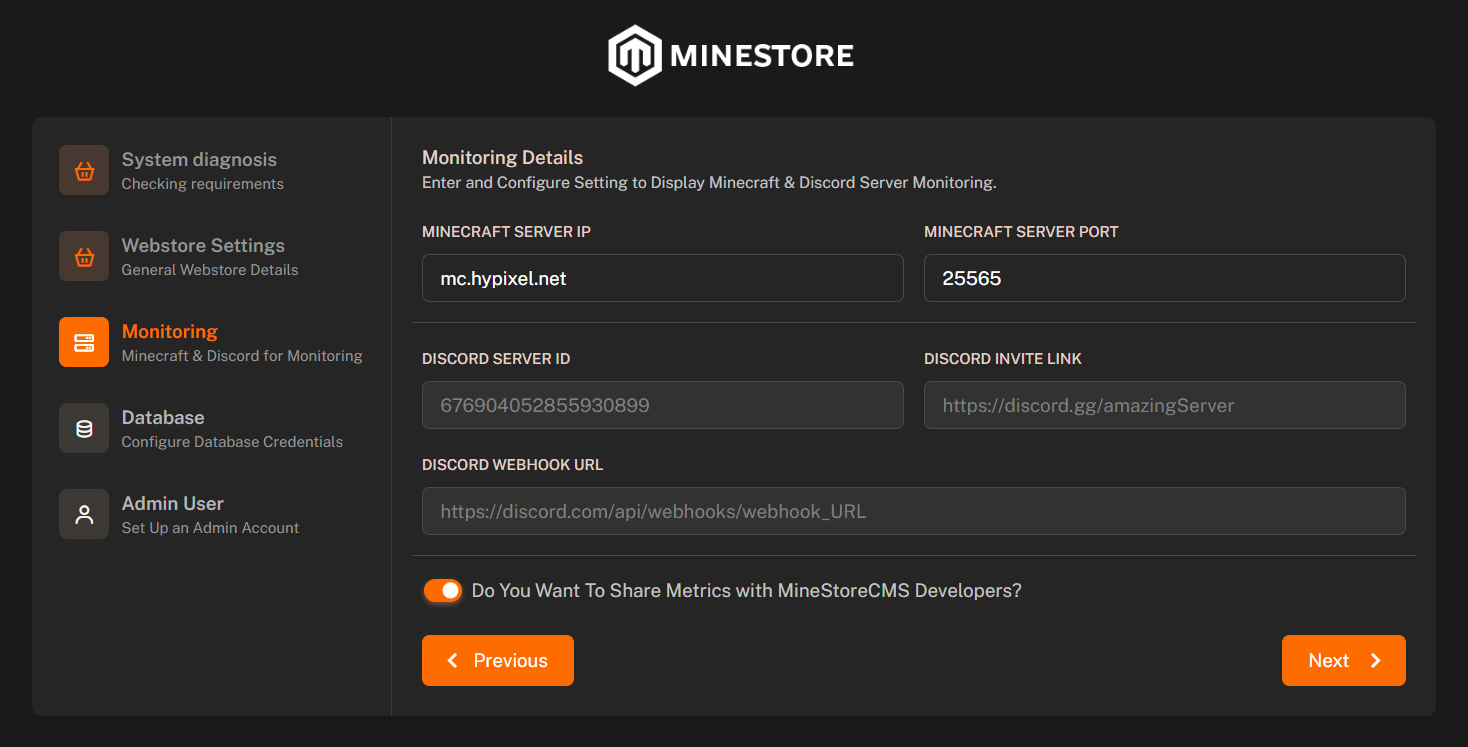
- Minecraft Server IP: Enter the domain (or IP address) of your Minecraft server.
- Minecraft Server Port: Enter the port of your Minecraft server (by default `25565).
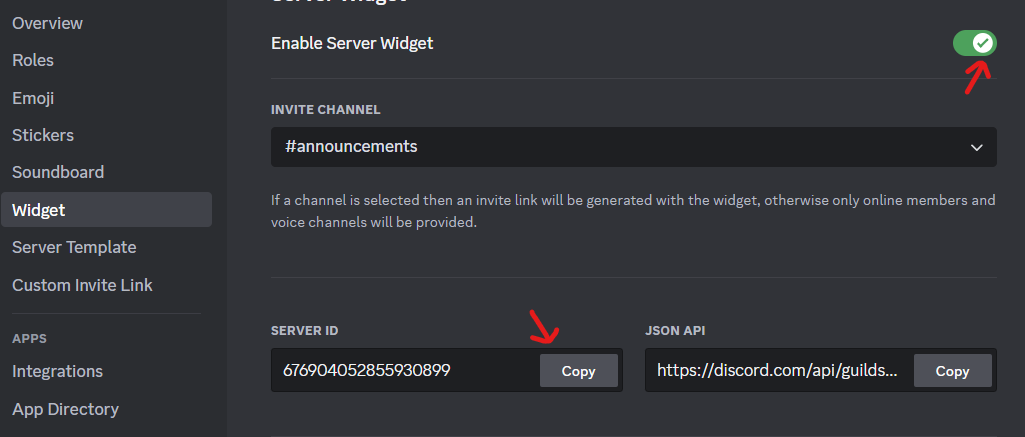
- Discord Server ID: Enter the ID of your Discord server.
- Discord Invite URL: Enter the invite URL of your Discord server.
- Discord Webhook URL: Enter the webhook URL of your Discord server.
- Open Discord and go to your server.
- Go to Server Settings > Integrations > Webhooks.
- Click “New Webhook”.
- Name your webhook, select a channel, and optionally set an avatar.
- Click “Copy Webhook URL”.
- Save Changes.
- Sharing Metrics: Enable or disable sharing metrics with MineStoreCMS.
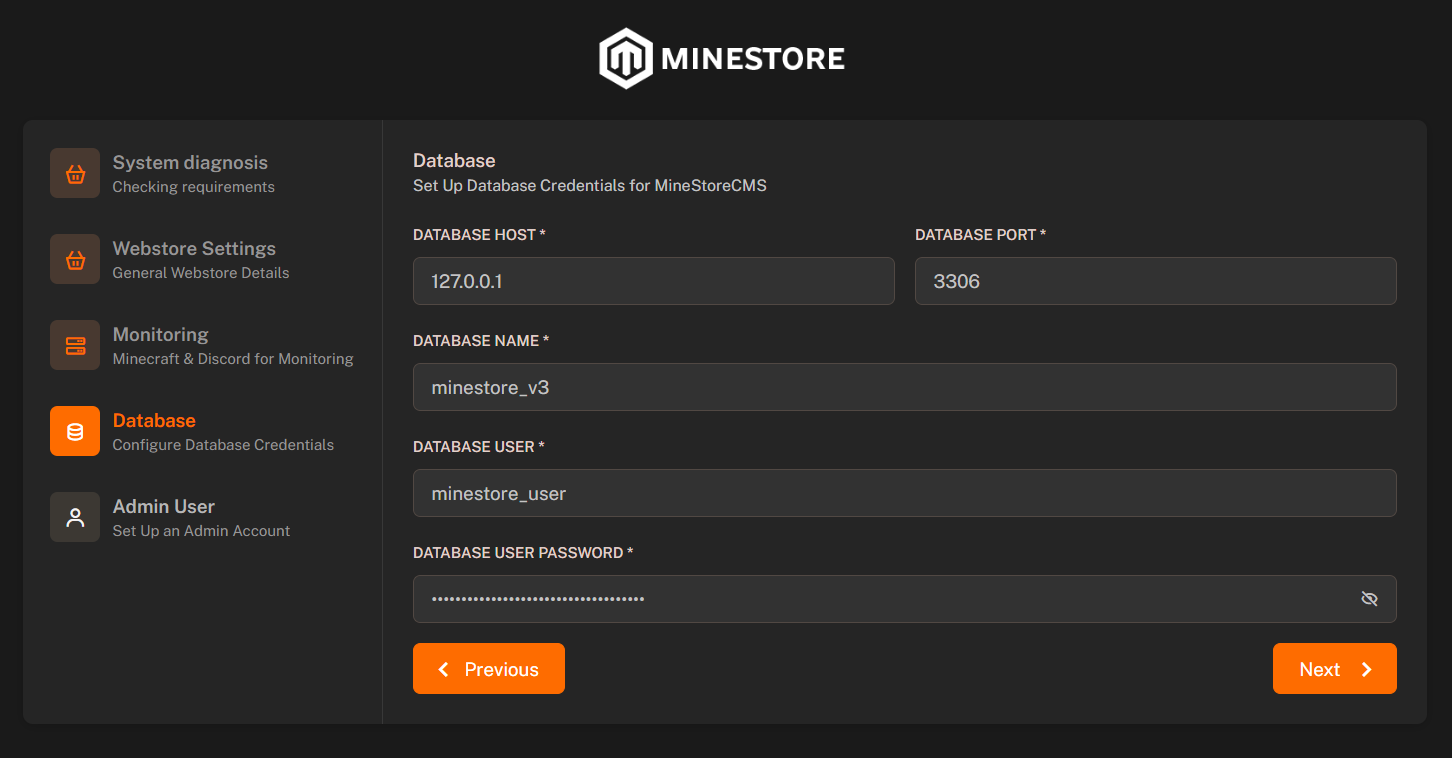
4. Database Configuration
If your server was clean before installing MineStoreCMS, the installer will automatically create the necessary database and user for you, unless an issue occurs.You don’t need to do anything here.
- Database Host: Enter the hostname of your database server.
- Database Port: Enter the port of your database server (by default
3306). - Database Name: Enter the name of the database you want to use.
- Database User: Enter the username of the database user.
- Database Password: Enter the password of the database user.
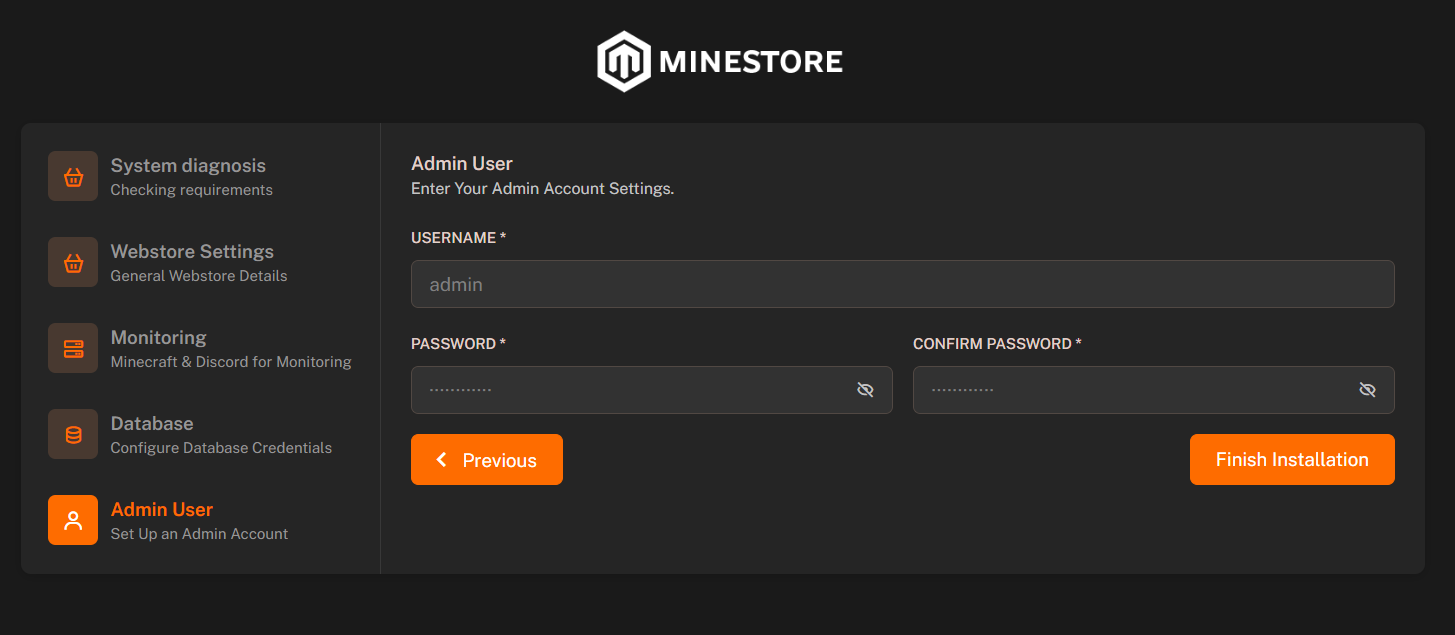
5. Admin Account
- Admin Username: Enter the username for the admin account.
- Password: Enter the password for the admin account.
- Password Confirmation: Confirm the password for the admin account.
6. Restart Server
After you have completed all steps, you need to restart your server to apply the changes. You can do this by running the following command in your terminal:7. Installation Complete
If all steps are completed successfully, you will see a success message and a button to navigate to your webstore and admin panel. However, if there are any issues, you need to resolve them before continuing. You need to check most common installation issues below and if you can’t resolve them, you can ask for help in our Discord Support Server.Installation Issues
Check most common installation issues and how to resolve them.
Discord Support Server
Join our Discord server for support and assistance.